1.Before installing your EPDM Roof System, make sure you pick a few days where dry conditions are guaranteed.
2.Lay down EPDM membrane on the substrate, checking to check if it has a top or a bottom by looking out for any printing, brand logos, watermarks etc.
3.Let the EPDM membrane relax for 30 minutes to an hour to get rid of creases.
4.Once you've let it relax, draw half the membrane back to the centre point and begin applying the water based adhesive with the paint roller.
5.Once you've completed one side, roll back the opposite side to the centre point and repeat the adhesive rolling and laying process.
6.After you've completed both sides, sweep the finished surface to remove any air pockets - this will also create more positive contact between the EPDM membrane and adhesive.
7.If you still notice any creases or unsightly folds in the membrane, put some weight down on those areas to promote bonding and create a professional finish.
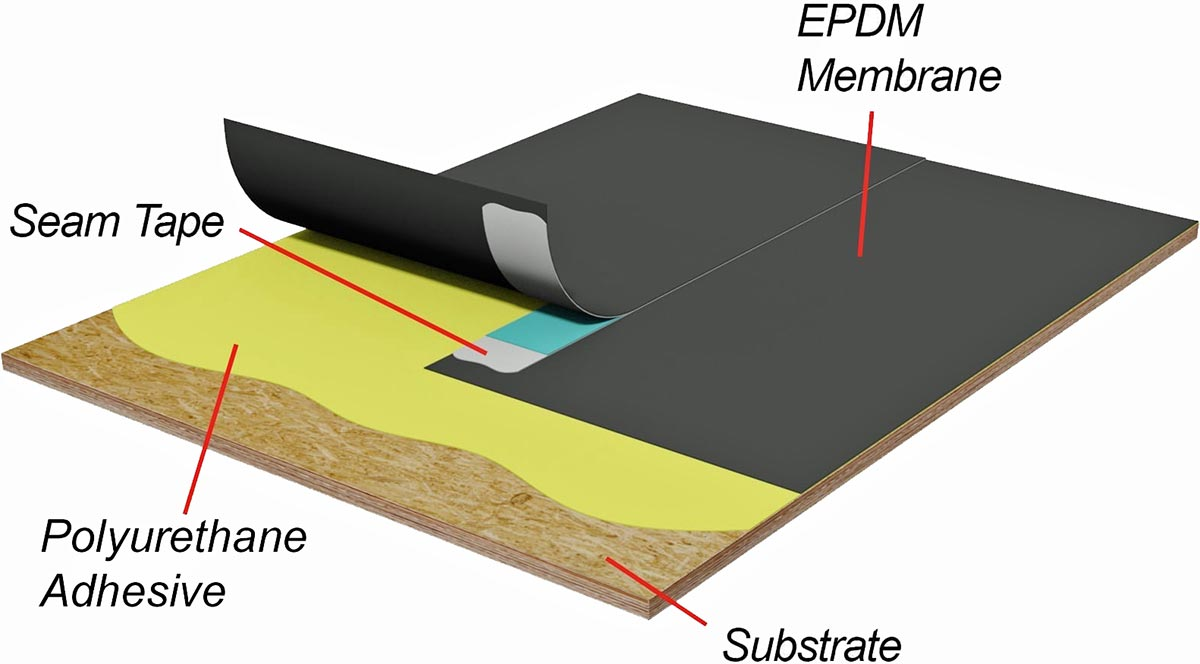
8.Using the smaller paint roller, apply the contact adhesive to the 150mm wide perimeters of the substrate - the contact adhesive creates a faster, stronger, more permanent bond.
9.Cut away any excess flaps of EDPM, leaving an overhang that is just a little shorter than the PVC trim that you're going to nail on and finish off the installing.
10.You may also be creating a gutter system consisting of timber battens and trim that will allow the water to flow off the roof and into the gutter.
WENRUN provides custom service and one-stop service for your roofing system. Except for EPDM rubber membrane we also produce drainage, pipe boot, scupper, inside corner, outside corner, seam tape, cover tape, flashing and other accessories such as plates, screws, termination bars. Please contact us for more information.
Post time: Jul-23-2022